")
Ballymena & Larne Railway Beyer Peacock 2-6-0ST (originally published in Railways, no. 44, Dec. 1943, page 190
Ballymena & Larne Railway Beyer Peacock 2-6-0ST (originally published in Railways, no. 44, Dec. 1943, page 190
Filed under Scale Drawings
Contents:
Editorial – Alan O’Rourke
GNR Hopper Wagons and Plough Vans – Alan O’Rourke
Lineside Details: GSR and CIE Tubular Post Signals – Alan O’Rourke
UTA MED Three-Car Diesel Train – Jeremy Fletcher
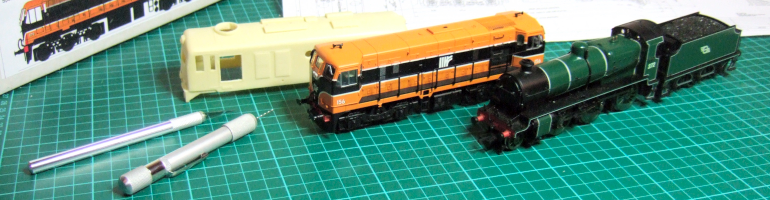
“Nearly Irish” – Colm Flanagan
The TDR Three-Plank Wagon Kit – Paul Titmuss
Fond Memories – A Moyner
Building BCDR Diesel No. 2 – Dennis Bates
Station Survey: Abbeyfeale – Alan O’Rourke
CIE Four-Wheeled Bulk Cement Wagons – Robert Drysdale
Scratchbuilding a CIE Cement Bubble – Des Sullivan
Christmas Quiz
Locomotive Portrait: CB&SCR B4 Locomotive – Graham Bridle
News & Views
Book Reviews
Filed under Table of Contents
Today, we have naming of engines… the following are all clues to names carried by Irish engines, although some may not quite line up with the reasoning of those who bestowed the names. See how many you can get before you reach for your Irish Steam Loco Register. Answers can be found by scrolling to the bottom of the page.
Answers:
Filed under Quiz
Peter Swift writes from Derby, with more information following last time’s editorial:
You suggest that Bonds had moved out of London during the war. They were certainly still in Euston Road when I was at University in London in the early 1960s, on the south side of Euston Road near the top of Tottenham Court Road. They may have started the Midhurst premises during the war and then retreated to it again in the 1970’s when London prices drove them out. Re the “oldest model making company” title, I think Bassett Lowke win the British title but there were certainly earlier ones in Germany. As Historical Model Railway Society (HMRS) Archivist, I have access to a wide collection of material including model company catalogues* in the HMRS collection, and also working and public timetables, as well as many other working instructions etc for the railways, which are listed in the open access part of the HMRS website hmrs.org.uk. Unfortunately, there are not many Irish items.
*Peter has kindly provided me with a list of these, some undated, but going back to 1912, and including other pioneers such as the Leeds Model Co and Mills Brothers. If anyone wants more details, they can contact Peter at: archivist@hmrs.org
Amsies Models have recently added vinyl overlays for Irish mark 2 coaches to their N and 00 ranges. More designs will follow if sales show there is a demand for these products. Amsies Models, 1 Burgundy Gardens, Burnt Mills, Basildon, Essex SS13 1NP Tel: 01268 470712 Mobile: 07534 211694 E-mail: paul.amestoy@blueyonder.co.uk Website: http://www.amsiesmodels.co.uk/index.htm
Patrick O’Sullivan sends the following notes on these overlays:
These are a new venture into the world of model railway for Paul and Victoria Amsie, and cover coaches in 4mm, 3.5mm and N-Gauge/2mm. with various liveries to suit ready-to-run vehicles. The overlays can be produced in any livery regardles of how complicated it is, and made to suit the customer’s donor coach. The finished colours are in good, strong colours and look superb. Any Irish coach livery can be provided to suit the customer’s requirements, in any of the standard scales, i.e. 4mm, 3.5mm, 2mm, and N-Gauge, and with the required livery, and running numbers etc. The vinyl overlays are best suited to modern flat sided vehicles, having said that there is no reason that they could not be adopted for raised sided coaches, if one is prepared to file off the raised detail, stick on the self-adhesive vinyl overlay and then glue on pre-painted strips. This seems to be a big break through in the world of model railways, especially for those of us who model Irish rolling stock. I have no doubt that, while this is a new product, it will transform railway modelling. Having seen this product first hand, I have no doubt that with a bit of forward thinking that overlays for Irish private owner wagons could be produced. Paul is going to forward me some samples to review, and once I have done this I will post my findings and include a copy for the next editon of New Irish Lines. A full demonstration of the technique of vinyl overlays with photographs is available on Paul’s website at http://www.amsiesmodels.co.uk
Patrick has also come across a new photographic collection, and is at present sifting through the Irish section: Transport Treasury, Logie Shannoch, Drumrossie, Insch, Aberdeenshire AB52 6LJ Tel: 01464-820717 Mobile: 07867 645410 E-mail: info@transporttreasury.co.uk Website: http://www.transporttreasury.co.uk/
David White (Whiteeno@aol.com) writes from Scotland:
Perth Model Railway Club to go Irish: The members of Perth Model Railway Club (Scotland) have decided to commission two new model railway layouts. One of the two new layouts to be built by the members of Club will be an Irish model railway. The Club made their decision to have something different after they viewed a range of Irish rolling stock owned by David White who lives in nearby Newburgh, Fife. David owns a variety of Irish rolling stock allowing him to run trains from 1945 through to today. The building of this new layout will commence in July 2008, its first showing is expected to be at the Perth 2009 Exhibition. Would any Irish Club be interested in exhibiting at Perth in 2009?
Ciarán Cooney (e-mail: harcourtstation@gmail.com) writes:
I was photographing some West Clare Railway stations a few weeks ago, and I photographed one at Blackweir, which strangely featured some pre-1950s style road signs. I recall in the newsletter you sent me a while ago an article written by a modeller, Doncha Cronin, regarding these type of road signs, and whether any were in existence today. I just thought I should inform you as he and possibly others may find the photos of use which I took. You can view them on this link on the website: http://eiretrains.com/Photo_Gallery/B/Blackweir/A&Bindex.html
These two pictures from Tony Hewitt (hewittht@tiscali.co.uk) show a model of Schull & Skibereen Railway no. 4 which he has built from various woods, ranging from 1mm plywood upwards. The wheels are made from ash, two varieties of mahogany and cocktail sticks Smaller components are turned on a lathe, and there are some brass parts for the cow-catcher and smoke-box fittings. The builder tells me he became a grandfather while building the model, and the latest addition to his family also rejoices in the name Erin!


Recent writings on Irish railways include:Anonymous (2008) Red Line: longer trams, shorter line Tramways & Urban Transit 71(848): 294, 295 [news paragraph and photograph]
Anonymous (2008) TRAM Power proposes trams for Galway Tramways & Urban Transit 71(848): 296 [news paragraph]
Pulling N (2008) LUAS gets to The Point Tramways & Urban Transit 71(846); 216-7 (June) [includes photos of work at Sandyford]
Pulling N (2008) Dublin Expansion Tramways & Urban Transit 71(850): 376 [LUAS extension]Heritage Rail May-June 2008 CDR goes for Barnesmore
Jones B, Fearn D (2008) Ireland on the move. Rail no. 596: 46-52 (July 16-29
Flanagan C (2008) The Green Pullman Railway Modeller 59: 489 (July) [00 gauge model]For any one trying to find items listed in the IRRS bibliographies from Linkline magazine, try the following website: http://www.businessandfinance.ie/client-publishing/ClientPublishingNewsletter.htm
For any N-gauge Irish modellers, there are now alternative and complementary group on MSN and Yahoo, so you can join in the debate whatever your preference for on-line groups:
http://groups.yahoo.com/group/irish_n
http://groups.msn.com/IrishNGaugeModellers
Other potentially useful websites are:Ernie’s Irish Railway Photos: http://erniesirishrailwayphotos.fotopic.net/Irish station photographs: http://eiretrains.com/Stations_index.htmIrish Model Railways: http://www.irishrailwaymodels.com/
Following Doncha Cronin’s picture of an Italian version of the CIE G-class (May issue, p.26 ), it seems that there may have been an Iberian branch of the family as well. I took the above photo at the railway museum at Gijon, in Northern Spain earlier this year: the museum has a fascinating collection of broad and narrow gauge and industrial equipment and is well worth a visit. This machine is Deutz no. 57706, built 1964, type B, DH, 140HP 20tons weight, eight cylinders, and it shunted private sidings in the nearby Trubia armaments factories. It runs on the Spanish broad gauge of 5’ 6” (1670mm).

Following Doncha Cronin’s picture of an Italian version of the CIE G-class (May issue, p.26 ), it seems that there may have been an Iberian branch of the family as well. I took the above photo at the railway museum at Gijon, in Northern Spain earlier this year: the museum has a fascinating collection of broad and narrow gauge and industrial equipment and is well worth a visit. This machine is Deutz no. 57706, built 1964, type B, DH, 140HP 20tons weight, eight cylinders, and it shunted private sidings in the nearby Trubia armaments factories. It runs on the Spanish broad gauge of 5’ 6” (1670mm). Foxrock Models first two kits for the Cork, Blackrock & Passage Railway brake van and open goods wagon are both now available (see may issue, p. 29). Both kits are also suitable for use in CIE days on the CLR section. The resin bodies and etched underframes are very well produced, and there is an excellent detailed instruction sheet including prototype information, and these should prove ideal modelling projects for the lengthening winter evenings for Irish narrow gauge modellers. The brake van kit costs £17 and the open wagon £15, both inclusive of postage there is a 10% discount on multiples of five kits. Orders should be sent to Simon de Souza at: Foxrock Models, 7 Ennerdale Road, Reading, Berkshire, RG2 7HH (e-mail: simon.desouza@btinternet.com), cheques payable to “Simon de Souza.” Simon has plans for future kits for the Cavan and Leitrim open wagon and milk-van/brake van, but clearly investing the time in producing these will depend on sales for the first two kits showing that this is a viable market.
A group has formed with the objective of opening a preserved 5′ 3″ gauge line in the Republic of Ireland. Some of you may recall that in a previous editorial, I posed the question of which former lines might support such a scheme. For further details see: http://www.heritagerailway.ie/index.html
Alistair Rolfe of No Nonsense Kits has re-introduced the cast ends for the GNR(I) AEC railcars (at £7-50 per pair) and cosmetic bogie sides (at £4-00 for four bogie sides i.e. enough for one vehicle, but will need an etched frame to produce a running bogie) from the old MTK moulds. The ends seem closer to the later CIE push-pull versions of these vehicles, but can be cleaned up to the original GNR form. It appears that these components complement the Worsley etches for these vehicles, and the cast ends may be easier to use than shaping the ends from the etched parts, although the inner end was (we think!) flat and may be easier to make from brass than to clean up the MTK casting, which was copied from the GW Collett suburban Bow-end (without steps). However, Alistair can supply these at £5 per pair if bought with the cab fronts. Most of the MTK Irish locos are currently being re-tooled, as a mixture of etchings and castings. They should be re-released over the next few years and NNK is developing a six-wheel mechanism which will provide the correct wheelbase for the larger locos. For four-wheel bogies they suggest Black Beetles. All kits will be suitable for 21mmgauge. The MTK Irish coach kits were usually aluminium body shells with cast ends, though the Park Royals, and Mk.II air-conditioned stock were etched. The Dart was also etched, with cast ends, though much of the tooling is a bit too rough to re-use. Unfortunately it is not practical (or viable) to produce short runs of aluminium-bodied kits, while the tooling for the etched body shells is very scruffy. It is not expensive to replace the artwork for the etchings, but if re-drawing it would make sense to get everything right. So, at present Alistair trying to gather information on the rolling stock, with a view to releasing complete kits, but there are some technical limitations to what can be done for the moment. He hopes to expand his machine-tool range to produce pre-formed body shells to the correct dimension, but this depends on a number of things, including finance and any specific demands from modellers may push specific items up the priority “to do” list!
P&P to the UK is £2 for orders up to £20, 10% thereafter. P&P to Eire is a little more, and will be advised on ordering. No Nonsense Kits now has a PayPal account, and can accept on-line payments: this should save the cost of Sterling bank drafts etc. for customers in the Republic. Otherwise, payment is by cheques or Postal Orders, crossed, payable to “No Nonsense Kits.” Contact details: No Nonsense Kits, PO Box 1009, Cardiff CF23 7YB Tel. 029 2031 7212 E-mail: nnk.website@ntlworld.com Website: http://www.nnkits.co.uk/
Worsley’s latest etchings are for the Schull & Skibereen Railway: http://www.worsleyworks.com. Etched sides for the GSR Pullman cars are expected shortly.
Denis Bates writes from Aberystwyth with further information on two items in the last issue:
GNR (I) Drovers’ vans: I’ve actually made a model of No.3, using the photo of 1957, and the line drawings, which I got from Tony Miles. Interesting that the doors say “drovers” although there are no side windows, nor the pot lamps on the roof. Does the inscription mean that they were still being used for drovers at that date? The differences between the two are interesting also. No.3 has wooden frames, and the outside vertical pillars extend down over the solebars. Nos.97 and 98 have steel frames, and the bodies are wider. Tare weight is greater at 15T.
UTA rail tractor: I have vague memories of one of these. I think it was actually built on a coach bogie, and didn’t have a “cab”. I think it was also used for a “goods train” – pulling a single wagon of coal from Queen’s Quay to Hollywood for a coal merchant based in the goods yard. I was in Sullivan Upper School there at the time.
[from Bill Scott’s new book on NCC locos, p. 165, it seems that when NCC railcar no. 2, built 1934, was withdrawn in 1954, the chassis and engines were used to make two of these tractors. Ed]
Another supplier of card kits for Irish narrow gauge wagon bodies is Hamlin Industries, 79 Harlington Road, Hillingdon, Middlesex UB8 3HY
E-mail:shamlin@hamlinindustries.com
Web-site: http://www.hamlinindustries.com/
I am grateful to our member Jim Fogarty for the following more direct link to the An Post die-cast models, and specifically the Morris LD150:
http://www.irishstamps.ie/webapp/commerce/command/CategoryDisplay?cgrfnbr=9256&cgmenbr=3421&cat_name=Collectibles/Coins%20&%20Postcards
In addition to his gazetteer mentioned on p. 32 of the May issue, Ralph Rawlinson now also has produced A ‘Register of Closed Railways’ which is on line at: http://www.closedlines.free-online.co.uk/index.htm
As many will know, the very useful SSM range of kits and components has been in limbo for some time, but we now have good news from our member Des Sullivan:
SSM under New Ownership
I am delighted to formally announce that I have taken over Studio Scale Models from Paul Green as of last July. A big thank you is owed to Paul as he has been most supportive and understanding in helping to get a handle on the various elements of the business. The entire range will be re-released, with all instructions revised and updated (over time), fully sprung buffers on the larger engine kits and transfer packs comprising of numbering, lining and crests or icons as appropriate. Some of the models will not be available right away (T2, SG and brake van) as I need to get moulds remade for some of the castings, but I will be accepting pre-orders for these. Prices will be finalised in the weeks to come. The full range is as follows:
Engines
GSWR/GSR/CIE J15 0-6-0 tender engine
GNR(I) S class 4-4-0 tender engine
GNR(I) SG class 0-6-0 tender engine
GNR(I) T2 4-4-2T
MGWR E class/CIE J26 0-6-0T
Coaches
GSWR six-wheeled five coach set
GNR(I)/CIE K15 open third bogie coach
GNR(I)/CIE L12 bogie brake third coach
Freight
GNR(I)/CIE 20-ton brake van
GSWR/GSR/CIE convertible wagon
MGWR/CIE convertible wagon
Subsets
GNR(I)/CIE 57′ or 60′ coach underframe
GNR(I)/CIE elliptical coach roof
GNR(I)/CIE coach castings pack
GNR(I) fishbelly bogie sides
Etched W-irons and brake gear
Contact me on dezsullivan@eircom.net or write to me at: 5 Radharc na hInse, Ballybeg, Ennis, Co. Clare.
Filed under News and Views

I have liked the look of this loco ever since I took a greater interest in Irish railways. I know of no kits but Alan kindly sent me some 4mm and 7mm drawings. At the time I was modelled in 4mm. I built a chassis for a B4 in 4mm but before I got any further I was at a small local show that was run by Gauge 0 Guild members. Although many scales were there, I was taken with gauge 0, which suited my eyes and ten thumbs better. So I changed scales. I made a loco from an etched kit and bought a brass pannier, yes I know not Irish but GWR is next best! I also decided to go with the flow and stick to 32mm gauge using C&L products. I decided to scratch build a B4. I made many mistakes as I went along for I am not good at working out all the pitfalls first. The chassis I built first and I will at some time make another. I tried full spring suspension but found making sure all was level difficult. I had made the frames from too thick nickel silver and found the gearbox too wide. I fixed the axle bushes and after some filing it fitted. But I forgot to reassemble on the jig so the running was poor. I think I stripped and reassembled four times, but it does run. The other main problem was with the bogie. Getting the right tension was difficult and I wonder if I should have used a swivel on a pivot set back.
The footplate and body were easier. The tank sides and cab were cut and soldered together to make sure they were symmetrical. There are flanges on the bottoms with captive screws so that the cab and tanks plus the boiler can be dismantled from the footplate separately although I now think this is not necessary. I invested in a riveter and roller. Rolling the boiler was not too difficult, the riveting monotonous and not easy to maintain a line if a reversal in the riveter had to be done. I do not have a lathe so I spoke to Laurie Griffin (Miniatures ). I sent the drawings to him and he did a good match with the boiler fittings. The chimney is not quite right but as all are screwed on I could change it if I find a better match. The boiler door also came from him and the darts. Other proprietary fittings such as the buffers, jack, and couplings were picked up at trade shows. The sand boxes I made and are also screwed on. The coupling rods I think were universal ones from Slaters laminated at the right length.
My painting expertise is not brilliant but it will pass my inspection and as it is intended for my attic this is okay. The detail is not totally accurate because I noticed things after I had soldered up (e.g. the buffer mountings should be round and the bunker is not quite right) but overall I am pleased. This has taken me several years to complete and I have enjoyed doing it. My better half said it was wonderful (honest!) but then it keeps me out of her way for many an hour. I bought a MGWR J26 kit on e-bay which will be my next engine. I do like the lines of the Neilson and Dubs engines supplied to the CB&SCR but I have no drawings. Anybody out there have any?
Prior to its gradual demise, the freight section of Irish Rail produced some very distinctive and unique rolling stock that just begs to be scratch built. We have also been blessed that MIR has provided several quality kits in the past few years to recreate them. The cement bubble has been one of these. However, when I decided to build an eleven to twelve unit rake of them over twelve months ago, the euro-exchange rate at the time proved to be something of a disincentive. I also wanted to capture some of the finer detailing that the existing kit as seen from the photo on Steve Johnson’s site didn’t seem to cover. Since having built them, the euro has strengthened significantly and the kit has been superbly revised (what with a very solid new resin casting of the bubble and gangway and ladder brass etchings). Oh well, c’est la vie. I was fortunate in having the opportunity to photograph several of them at the old container sidings in Limerick station which revealed the finer detailing and colouring that would add to building a suitable model.
The basis for most 20’ four wheel CIE freight stock is the Dapol C043 cement wagon. The distinctive springs, spring hangers and brake levers are all well captured on this model. Also, because it is a plastic kit, there is much more “depth” to the brake mechanism than one would get with a single piece RTR moulding. The dimensions are a little out, given that the model is a OO/HO hybrid, but this is really of minor importance compared to the abundance of chassis detailing. Finally, there are several parts in the C043 kit that with minor alteration can be used to provide the extra detailing needed for the rest of the model.

Paint (beige, black, grey, white).
Chassis Construction
First, completely pare back and remove the raised rim on the wagon floor plate (part 6) using a sharp knife or blade.
Scribe and then remove the central part between the two holes. I drill out several 6mm holes to make this easier.
Chamfer the straight sides of the hole at 45° to make for maximum surface and gluing contact between the bubble/egg and the base.
Construct the chassis as detailed in the Dapol instructions, make sure any flash or mould lines are pared and sanded back. The main focus of these is at the buffer sides.
Remove the moulded chain from the end hooks prior to fitting as it will impede the coupling bars otherwise.
Widen out the wheels on the axles ever so slightly (0.2-0.3mm). Drill two holes on either side of the frames for the levers.

Base Detailing
The hole left after removing the central section of the plate is too long and will leave a gap at either side when the egg is put in place. You will need to construct a new wagon floor sheet from styrene sheet that the bubble can sit into, see the adjacent diagram for the appropriate dimensions.
Remember, fit-check-pare and repeat until a precise fit is got prior to gluing. Then glue down the sheet onto the original chassis top. It will take a bit of time, but once done properly, constructing another ten or fourteen can be done with assembly-line ease. I made a stencil from styrene and used it to draw out and cut the other eleven chassis sheet covers once I was happy with the final dimensions.

Identify the plate (part 44). This has raised diagonal detailing that matches the prototype closely. Cut to size by removing paler material as shown in the attached diagram and remove the nodge on the top. Fit at one end of the wagon floor sheet, opposite of where the ladders will be.
Construct the cement pipes from chopped up parts 55 and 56. Mark and drill 0.8mm holes in the floor sheet at the other end (opposite to where plate is on) and fit. Bend and then glue some 0.6mm wire to the back. Cut a 5mm length of lollypop stick at a 45° angle using a sharp knife, and mount near the pipes as shown.

Making the Bubble
One of the delights of scratch building this model is that the bog standard Kinder Egg is an almost exact scale replica of the bubble in terms of the hemispherical ends. It does require lengthening and this is done as follows.Take a male section of one egg and carefully cut off the outer 4mm of the rim. This is easy enough to do as the egg wall has a thin channel or groove here to act as a cutting guide.

Take the other egg and roughen the ends with sandpaper and then shape a small piece of Milliput so as to round the ends. I recommend dampening the Milliput , applying to the egg end and then shaping it in the palm of your hand. Leave to dry overnight.
Fit the second egg ends together as shown and use the cut off piece from the donor egg (!!) to fill out the gap. If the rim piece is cut carefully, it should be a perfect fit. Glue the three pieces together. Note that the plastic used does not take glue very well (even Superglue) so handle carefully. It may be worth trying a more full-bodied epoxy glue though I haven’t done this to date. Glue the egg to the chassis base. Glue some lead window strip underneath to add weight and ballast.
Other Detailing
Fit the manhole cover (part 51) as the Bubble cap.
Bend and glue the guitar wire as vacuum pipe.
The gangway can be made from net-curtain mesh (or K&S etched mesh) with a thin rim of styrene sheet . Use double thickness styrene triangles as gangway supports and glue to the side of the bubble.
The ladder included in the kit is perfect, but there is only one in each kit! I suggest Ratio signal ladder as an alternative. It is also a little finer in scale.

Given that a rake of fifteen will probably remain permanently connected, for added realism I suggest using the coupling provided for the end wagons, and very light gauge wire loop glued to the hooks to connect each of the interim wagons.
Note: I will be producing a brass etch of the gangway and supports as an all-in-one bendable unit as an alternative to the above. It will also include the ladders. This should be available in January 2009.*
Painting and Transfers
Painting offers a few challenges as the model has had several liveries, including orange and beige. However for the last decade and more, most of them are an interesting mottled shade of greyish white with algae green streaks. The chassis originally was black but is now usually a non-descript grey-brown. If you are going to be building or repainting any volume of models, I strongly recommend purchasing a good quality air brush, such as an Iwata HP-CS and a mini-compressor. These can be got for quite good value off eBay. The simple reason is you can paint a brace of kits in a matter of minutes using diluted acrylic paint with a smooth, uniform coat that covers even the most inaccessible parts, dries quickly and allows repainting almost immediately.
Paint the model in the following order:
To Conclude…
Oh the hours of blood, sweat and tears that can be summarised in little over three pages! However, taking the approach as laid out above and tackling them in an assembly line fashion, you can build a fifteen-unit rake for little over €100 in a matter of days. The main points to re-iterate are: get plenty of pictures to be in that comfort zone about the detail locations and take your time to get the chassis cut out and chassis sheet dimensions and angles correct. You’ll be well rewarded. In a future issue, I’ll tackle how to build the 20’ beet wagon using Corrugated sheeting. Nice!
[Ed: I once weathered a OO lime wagon with toothpaste, which looked like a thick coat of chalky minerals, but I would advises a test-patch, as some paint finishes may not tolerate tooth-paste.]
Filed under Modelling
We have already represented the North Kerry line in this series, but another station will not come amiss, especially as elevations of the main building are to hand. Abbeyfeale station opened with the rest of the Newcastlewest-Tralee section on Dec. 20th, 1880. The original plan was for a single platform, but by July 1881, the station was re-modelled with a passing loop and second platform to make it suitable for crossing passenger trains. The station had a 293’ long down platform (with a 3,530 gallon water tank), 224’ up platform, carriage dock, a long shunting road and a crossover from the goods store to the platform road. In 1881, it acquired a Gloucester Carriage & Wagon Company signal cabin. In GSR days, staffing consisted of a station-master, clerk, two signalman, checker, porter and a guard. As with many smaller Irish stations, it really came to life for livestock traffic. Typically, for Abbeyfeale fairs, ten wagons were supplied in advance, with a special of another ten to twenty from Limerick about 7am, and a loaded train back to Limerick about 2pm. For bigger fairs, Limerick sent down a special of twenty-five wagons the day before, with the engine stabled at Listowel overnight, and in the morning, there was a special from Tralee of fifteen wagons and a buyers’ coach, and for the main Autumn fairs, which might generate three specials, there was an empty train of twenty wagons train from Limerick about 7am in the morning. If anyone wants a narrow gauge feeder, they can employ a little modeller’s licence, and conjecture that one of the numerous still born plans spawned by the 1883 Tramways Act had proved more successful. In 1884, the Abbeyfeale & Brosna Tramway was promoted to run south from Abbeyfeale, with baronial guarantees from Glenquin in Limerick and Trughenacmy in Kerry, and in 1885 the Limerick & Kerry Light Railways and Tramway Company, prepared Bills for both Abbeyfeale-Brosna and Listowel-Ballybunion schemes. None of these ideas seems to have progressed beyond the planning stage.
The broad gauge line lost its passenger services in 1963, and Abbeyfeale closed to all traffic in November 1975, but the building is well maintained as a private residence with the water tower and platforms intact. The goods store still stands but when I walked through in 2002 was labelled “dangerous” and the roof was beginning to decay. The town lies to the south. At the west (Tralee) end of the station, the line crossed the road north to Athea by a girder bridge, and then ran along an embankment, to cross the Oolagh River by a steel girder bridge with 40’ span, which could provide some scope for scenic modelling, and where open-plan baseboards might help.
Details of North Kerry line locomotives, rolling stock and timetables were given in New Irish Lines, Nov, 2000. There are photographs in the O’Dea Collection in the National Photographic Archive of Ireland and Adrian Vaughan’s collection.

Abbeyfeale station above as opened, below as modified to be suitable for passing passenger trains, 1881: later additional trackwork shewn in broken lines. Line to Limerick and Newcastlewest to left of both drawings; line to Tralee to right.

Platform Elevation

Floor Plan

Section A-B

Bedroom Level
The elevation, plan and section are from GSWR 8″:1′ scale architectural drawings, courtesy of the IRRS.
Filed under Prototype, Scale Drawings, Site Surveys
I used to buy secondhand model railway magazines for specific articles, particularly drawings or construction products. However, when browsing them now, I find myself drawn at least as much to the editorial sections. I have to admit that the older volumes of Model Railway News are my favourites. It is quite fascinating to look at the very first issue for January 1925. Until 1939 the cover used a line drawing, rather than a photographic illustration, the design passing through three versions, the last being a non-descript, but vaguely “Baby Scot” 4-6-0, partly obscuring the name board at a station that could thus only be identified as “…North Junciton” and pulling past a lower-quadrant starter. Until 1939 the cover also included the slogan “steam – electric – clockwork,” reminding us that for most modellers, there were still several means of propulsion to consider. That first issue included an interview with the legendary GP Keen, an article on the “possibilities” of OO gauge by Mr Stewart-Reidpath and letters of support from a baronet and a colonel reminding us that railway modelling was not quite yet a mass hobby. Pre-war contributors also often used pseudonyms such as engine numbers or the names or initials of railway companies, especially the pre-group concerns, which had just lost their independence and which still enjoyed fierce partisan loyalty. Thus correspondents signed themselves Churchwardian, LSWR, Vulcan, Terrier or 9903.
It is also interesting to read some of the social commentary. So, for instance, the June 1926 editorial decries the General Strike. June 1929, on the eve of a general election, produced some speculations on politicians’ plans for the railways, such as the abolition of private owner wagons in the interest of greater efficiency, and the introduction of new American style 40-ton high capacity wagons. The adverts are of course also period pieces now and some of the items in that year’s commercial sector, such as huge lead-acid accumulators, seem more appropriate to heavy industry than an indoor hobby, although an earlier editorial (January 1927) had warned of the very real risk of electric shocks to children from model railways.
October 1939 brought a gloomy editorial, apologising for the reduced size of the magazine and the small number of illustrations, and even wondering if the ensuing war publication could continue at all. In fact, although reduced to 20 pages and a 5″ by 8″ format, the Model Railway News managed monthly publication throughout the War, despite being bombed out of its office in October 1940, the first of three such direct hits on its premises. Even the Railway Magazine went down to six modest sized issues each year from 1942 to 1949. Paradoxically, the enforced blackouts of the “Phoney War” may have increased the amount of modelling activity in the early part of the conflict. March 1942 brought appeals for the wartime scrap metal drive, and later for other material like waste paper, but with the caveat of saving useful modelling material and historical documents. In July 1945, the editorial could mark the end of the Second World War, although shortages continued, and in 1947 John Ahern reminded readers that everyone actually had a right to buy £1 worth of new wood each month, and that this could be augmented with salvaged timber. Prices were then of course more stable. Having sold initially at 6d per month, the MRN had risen to 9d in 1944, but kept the price for another seven years.
As the 1950s wore on, there was news of the modernisation plan for British Railways; “standard” designs of steam locomotives; and the Atomic Age, with reports of plans to build 12 new nuclear power stations. These items lead to debate about large-scale railway electrification and the preservation of more traditional equipment. By December 1955, some enthusiasts were already bemoaning the end of the Steam Age, but even on BR that took another 13 years. Beeching cast a shadow in 1963, the same year that saw the arrival of Minic Motorways, for a while regarded as a serious threat to the popularity of model railways, and with obituaries like the one for William Stanier in 1965, one could only feel that an era was passing. However, the end of revenue-earning BR steam in 1968, although acknowledged, was not specifically mourned. By then, however, I feel that the days of the old Model Railway News iteself were numbered. It published its last issue in August 1971, went into a chrysalis and emerged the following month as the big glossy, brightly coloured Model Railways.

Colm Flanagan's model of Newcastle station building, which will be finding a new home at the Downpatrick Railway Museum later this year, when Colm commences work on a new layout. (Photo: Colm Flanagan)
Until the end of the 19th century, the typical ballast wagon was a primitive short wheelbase vehicle, with low drop sides, leather flaps to try and keep the stone dust out of the grease-axle boxes and, possibly still, dumb-buffers. To go with these, there might be a “ballast brake van,” often derived from an even older four-wheel coach, and sometimes a sort of combined tool shed and mess hut on wheels. But, from the 1890’s, a number of companies, including in Ireland, the GSWR, MGWR and GNR(I), started to modernise their permanent way stock, introducing higher capacity steel hoppers, where instead of shovelling the ballast out of low-side wagons, it could be deposited directly onto the track through bottom doors, and also “plough vans” with steel shears underneath, which at least started the process of distributing the gravel. These drawings show the GNR designs of the period, and a very similar, but later, design for gypsum traffic. The plough vans and eighteen hoppers came from Hurst Neilson & Co. of Motherwell, and were of all-steel construction. The ballast wagons had self-discharging hoppers, which could be operated by screw mechanisms from either side. The van had double plough-shears between the wheels, so it could operate running in either direction, a large veranda and a covered portion with stove and lockers. All this stock had vacuum and hand brakes, and oil axle-boxes. An unusual, and it seems only experimental change was the use of “GNR(I)” lettering, instead of the more usual “GNR” and later “GN,” although since this only appears on the Neilson maker’s photos, it may have been their whim, and rapidly replaced by the orthodox legend on arrival at Dundalk. Similarly, although the posed official shot shows the van running as number 120, the GNR drawing lists them as 8166 and 8167, both built in 1910, and costing £242 each. Similarly, the Neilson hoppers, all built in 1910 at £138 each, had running numbers 8097-8114. Another nine hoppers came from Pickering in 1912, at £149 each, running as 8139-8147.

GNR ballast hopper 149, a Pickering maker's photo (Photo: Historical Model Railway Society Collection, no. W1007)
 Ballast Plough & Brake Van")
GNR(I) Ballast Plough & Brake Van.
At the dissolution of the GNR, UTA got fourteen of the hopper vehicles, and the remaining thirteen went to CIE, for which the following details are recorded:
| GNR No: | Tare (Tons-CWT-Quarters): | Date brake gear altered to take standard CIE KD block: |
| 8098 8100 8102 8104 8106 8108 8110 8112 8114 8140 |
– 7-14-0 7-10-3 7-12-2 7-17-1 – 7-13-1 8-2-3 7-14-3 – |
1962 1962 1962 1961 1962 1962 1961 1962 1962 1960 |
 20 Ton Hopper Ballast Wagon")
GNR(I) 20 Ton Hopper Ballast Wagon

GNR ballast plough van no. 120, a Neilson maker's photo (Photo: The Locomotive Magazine & Railway Carraige & Wagon Review, January 14th 1911)

GNR ballast hopper no. 107, a Nielson maker's photo, showing "GNR(I)" lettering (Photo: The Locomotive Magazine & Railway Carraige & Wagon Review, January 14th 1911)
The gypsum hopper drawing does not have any notes about outside builders so I assume they represent Dundalk’s adaptation of the earlier ballast hoppers. Six of these were turned out in the Second World War (or did the GNR call it the Emergency, or like the Church of Ireland prayer book for “our leaders” have different rubric for each side of the Border?). I am assuming that these worked from Kingscourt on the MGWR, being handed over at Navan and forwarded on GNR trains to Drogheda cement factory. These vehicles were built with hand brakes only but cost had risen to £477 each (£205 wages, £235 material, £37 other charges), and the following details apply:
| No: | Date: | Tare: | Brakes Altered: | Brake Screw Protection Plates Fitted: |
| 6015 6016 6017 6018 6019 6020 |
Oct. 1944 Oct. 1944 Oct. 1944 Nov. 1944 Nov. 1944 Nov. 1944 |
8-1-1 8-1-3 8-2-0 8-2-0 8-1-3 8-1-3 |
Nov. 1945 Oct. 1945 Oct. 1945 Oct. 1945 Oct. 1945 Nov. 1945 |
Apr. 1946 Apr. 1946 May 1946 – – – |
 20 Ton Hopper Wagon (Gypsum Traffic)")
GNR(I) 20 Ton Hopper Wagon (Gypsum Traffic)
Reference: Anonymous (1911) New Rolling stock. Great Northern Ry. (Ireland) The Locomotive Magazine & Railway Carriage & Wagon Review 17: 22 (January 14, 1911).
I am grateful to the IRRS archives and Mr Brendan Pender for access to the GNR drawings and permission to reproduce them.
Filed under Prototype, Scale Drawings
It is not intended as a direct insult to the steam junkies, but my own personal preference is for old railcars etc. which have been neglected or ignored in the past by the mainstream as a lower form of life compared to steam locos, which they are not! Only now are they receiving more attention and appreciation, but still individual prototypes only attract modellers’ attention after all have been scrapped and proper measurements are hard to get! I previously made a model of the long gone GNR railcar ‘A’ on which I wrote up an article for New Irish Lines, May 2005. I have since made a model of the UTA MED diesel train. I made my model of a three-car MED set using brass etchings which I got made by Allen Doherty (Worsley Works). The etching sets are a basis for scratch building rather than what are normally sold as a kit: they just include body sides, ends and floors. Other parts such as roof and bogies, have to be obtained elsewhere or made by the modeller. I made the coaches by building them up directly from the etchings rather than doing “overlays” on existing available coach bodies. Suitable ‘donor’ coaches would be extremely difficult to get where I live!. Building directly from etchings is certainly a much more laborious way of doing it as I found out! There is much more soldering and it requires care to avoid excessive warping and distortion.

Worsley Works three-car MED set

Worsley Works three-car MED set

Worsley Works three-car MED set
The Worsley Works MED coach sides came in individual between-doors sections, aligned in their correct relative positions only by the fret sheets and separated by the spaces for the sliding doors. It was therefore necessary to attach these together by soldering in the separate sliding door etches to produce complete one-piece body sides before they are separated from the frets to maintain the alignments. It is also easiest to curve the body sides to the correct profile using the coach ends as templates before removing them from the frets. This is made easier by first bending the sides and the sliding doors separately before soldering the doors in place. I added narrow brass strips between the sides and the door edges to give more “depth” to the openings. The coach sides were very flexible and prone to buckling, so I made interior partitions from shim brass and added brass cant rail strips along inside the top edges to add rigidity. I made the coach roofs from thin styrene sheet (Evergreen) which I bent to match the profile of the coach end etches. Working with styrene sheet has its own fun aspects as it tends to warp when joined with liquid cement! I made the cab ends by filing from styrene. Much filing and fiddling were required! I used the etched brass floor sheets provided. As they are very thin and flexible I reinforced them by soldering on pieces of discarded brass code 100 rail.
I powered the MED set by means of small flat can motors with flywheels, one under each power car, hidden by the under floor/engine details, driving by flexible shafts to small homemade final drive gearboxes which ride on the inner axles of the bogies. This gives four driven axles out of a total of twelve, with the problems of traction tyres!. I used Comet LMS bogies which I modified to give insulated sides, with insulated half stub axles (Athearn style) to give current pick up on axles. All axles pick up. I used Northwest Short Line nickel silver wheels, which stay clean and give good pick up, and the MED set runs smoothly. I used Markits coach buffers and Ratio corridor connections. I made basic interior seats from styrene as the coach interiors are very visible through the many windows. The MED train runs fairly well on ordinary DC, but I do not know how well it would run on DCC.
Filed under Modelling


You must be logged in to post a comment.