Tag Archives: scratchbuilt

A Rake of Coaches: Or How Solving One Problem Leads to Another

John Mayne


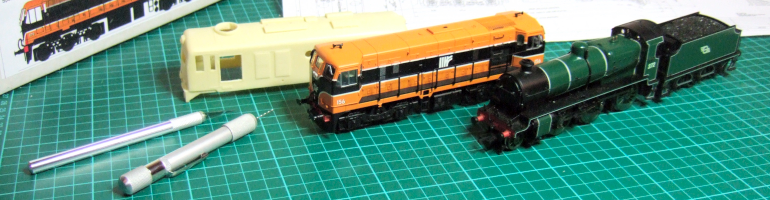
It started out simply enough early in 2004. I saw the listing for a laminate brake standard on the Worsley Works web site and thinking it was a model of the 1958 brake composites, I bought the coach and a Deutz loco kit. I had been involved with the MRSI Loughrea group for many years and thought these models would give us a more accurate representation of the branch line in the “modern image era.” The only thing was that I was in the middle of planning a move to New Zealand!  So the Deutz and coach have never had a trip on the Loughrea layout. The Deutz is essentially a complete loco kit without wheels motor, detail castings and turnings, the coach basically consists of sides ends and underframe, the builder has to source roof, bogies, interior, detail casting and bogies. While the Worsley Works coaches are basically similar in design to Comet, the main issue is in forming a roof as most Irish stock is wider than the British; Comet and MJT extrusions are too narrow.  I model on 21mm gauge and while proprietary Commonwealth bogies might pass muster, I wanted the model to be as accurate as possible and bogies would require custom made side-frames. I was impressed with the detail of the coach and ordered an AEC railcar set, a Laminate second and a Park Royal coach: in for a penny,  in for a pound. Basically the idea was to commission any special components required such as bogies, roof extrusions or pressings and detail parts from UK manufacturers, to complete my own models and test the potential market.

Disappointingly, few of those I contacted responded or demonstrated a willingness to follow up on a serious enquiry for the design and  manufacture of components to compete the project. I had experimented with forming the roof profile variously from brass, plasticard and balsawood without much success, there is little practical guidance on scratch building coaches or metalwork in the contemporary model press. Commissioning an extrusion locally was prohibitive. Eventually I followed Allen Doherty’s suggestion of using a proprietary extrusion as a basis for cutting and filling to a wider profile. Bogies are based on MJT torsion bar compensation units which are easily adaptable to the wider gauge, and other details are a mixture of Comet and MJT components.

The Coaches:
Unlike the relatively rapid development of the BR Mk.1 stock, Inchicore like the GWR in the 1930’s, seemed to have difficulty in building two batches of coaches to the same design and went through several stages of development before the arrival of the Craven stock in 1963. Briefly the 1953-4 period  saw the introduction of a wide range of hauled stock based on a development of Bredin’s GSR flush sided timber framed designs, including open and compartment coaches, buffet, restaurant cars and mail vans. The earliest vehicles ran on GSR design bogies and traditional steel under-frames, later batches incorporated Bulleid triangulated under-frames and Commonwealth bogies. Even in the 1950’s such stock would have been expensive and labour intensive to produce and not readily adaptable to mass production, requiring a large highly skilled workforce to machine and assemble components. The Park Royals with their prefabricated components allowed volume construction using a semi-skilled workforce. Significantly though designed for suburban and main line use, only one design of body shell was produced.

1379 class Park Royal suburban coach

1379 class Park Royal suburban coach

The laminates (aluminium, insulation, plywood panel) are best described as of modular construction with several body designs (based round a small number of components), again allowing rapid construction. There appear to have been at least four designs: a brake composite, 70 and 64 seat main line standards and a suburban coach. I recall laminate coaches being refurbished at Inchicore in the late 1970’s. Each coach was stripped down to roof, ends and under-frames, and re-skinned; either CIE still had a stock of body panels or the manufacturing capability existed. One theory was that it was originally planned to replace the bodies after 20 years, but this was no longer required following the introduction of monocoque design in the 1960’s. Inchicore appears have briefly reverted to timber frame body design for its final batch of twelve coaches (ten standards and two firsts) before the arrival of the Cravens in 1963. Significantly these coaches used the heavier BR pattern of Commonwealth bogie.

The brake standard appears to be based on the 1970’s conversion of laminate coaches to brake standards rather than the 1958 brake composite design. The brake standards of this era were converted from laminate suburban stock and 1953-4 composites. The Worsley Works kit is of a different pattern and appears to be based on a conversion of a main line laminate standard. Two laminate brakes are preserved one the DCDR at Downpatrick, another by the RPSI as a service vehicle in their Dublin excursion train rake. The laminate standard and the Park Royal appear are to be accurate representations.

1448 class laminate standard

1448 class laminate standard

The etchings make up in a similar manner to the Comet coach kits, with the body sides and ends designed to be removable from the chassis. There is a half etched representation of the joints between the body panels, a distinctive feature of the laminates. The chassis comprises a main floor etching, with fold down truss rods, with separate etchings for solebars and a lower body stiffener making up into a nice solid chassis.  The solebars on the laminates and Park Royal coaches do not run parallel with the sides, the coaches running on Bulleid’s triangulated under-frames.  I have left well enough alone, though solebars, say from brass angle, could be set up in a jig to capture this subtle and distinctive feature of CIE stock of the era. The sides are easy enough to curve using brass bars and a straight edge. The Park Royal sides are etched in three sections with over lapping tags but are a bit flimsy being half etched.

Laminate coach - first section of roof in position

Laminate coach - first section of roof in position

I would rather use a formed sheet metal roof like the TMD Bredins, should a suitable one become available. I recently completed a C&L narrow gauge coach: forming the arched roof even with the down ward curving ends was simple enough, though forming a “modern” elliptical roof is a different matter and a subject seldom if ever covered in the main
stream model press. The etched brass assembly is soldered, and the aluminium roof extrusion glued in place using cyno reinforced with epoxy resin, with a strip of plasticard to reinforce the joint between the two sections of aluminium and support  the filler.

Laminate brake standard

Laminate brake standard

In the end on Allen’s suggestion, I used a Comet BR Mk1 roof extrusion cut down the middle the gap filled with body filler. The roof detailing covers a multitude of sins and lifts the model. Comet torpedo ventilators and PC lining strip  gives the roof its distinctive and  jointed appearance.  I decided to include a fairly high level of detail with door hinges, knobs, handles, toilet filler and communication cord pipe-work. Next stage is pattern making and castings for bogie side-frames, dynamo and vacuum cylinders, heating and  vacuum pipes, couplers, finish painting, build layout, couple up to B141!

Laminate coach sides clamped while glue sets

Laminate coach sides clamped while glue sets

Worsley Works underframe, MJT bogie compensation units, plasticard spacers for 21mm gauge, MJT LNER buffer shanks

Worsley Works underframe, MJT bogie compensation units, plasticard spacers for 21mm gauge, MJT LNER buffer shanks

Laminate coach with Comet seating units, plasticard floor and bulkheads

Laminate coach with Comet seating units, plasticard floor and bulkheads

There is also a lot of useful information on building etched brass coaches like these on the Comet Kits website: http://www.cometmodels.co.uk/ Follow the links: Downloads  Building Coaches the Comet Way.

[Ed: for more details see the following paper on coaching stock built for or by CIE from 1945 to the arrival of the Cravens: Kennedy D (1965) Modern CIE Coaching Stock Journal of Irish Railway Record Society 7 (37): 14-61]

Leave a comment

Filed under Modelling

Hints on Putting Together Etched Brass Coach Kits

Jeremy Fletcher


Brass etch kits, or etching sets, provide a useful way to produce good quality models of non-mainstream or obscure prototypes which are not of interest to the larger commercial model manufacturers who need large production runs to cover the costs of specialised tools and dies.  They fill a gap between commercial models and scratch built models which many modellers may not want to attempt. Some people regard brass etchings as ‘hard’ as they usually involve soldering which is anathema.  Soldering is not really all that hard to do once you get started and gain some practice.   Basically it is just like using a liquid glue (Super Glue) which runs between the pieces to be joined.  The solder has to be melted to run by capillary action between the pieces and it sets when it cools off.  As for any glue, the pieces have to be clean and in the case of soldering the final cleaning of the metal surfaces is done by the flux.  The metal is first cleaned of dirt, oxides etc. using emery paper or filing. You could say the filing does ‘mechanical’ cleaning and the flux does ‘chemical’ cleaning. Oxides build up quickly on the hot soldering iron tip and need to be cleaned off regularly with a wire brush.  A potential source of complications occurs when soldering together long pieces.  Thermal expansion can cause warping or buckling.  It is best to ‘tack’ the pieces together in a few places; make sure they have not become buckled; and make corrections as required before going any further.  You may have to unsolder, let the part cool, clean off excess solder and try again.
 
There are various ‘suppliers’ of etching sets.  They generally supply few detail parts such as those mentioned below. Most modellers prefer to supply their own.  My own experience so far has mostly been with the Worsley Works coach etch sets and I can best comment on these.  These come as sets of etched frets and are really intended for use by scratch builders, providing hard-to-make parts such as panelled coach sides, fine grillwork etc.   Bogies, wheels, buffers, coach roofs etc. have to be arranged by the builder. Coach etching sets are generally provided with the walls, ends and floor but, typically no roof.   The floor may have fold down under-trusses and battery boxes etc. It is intended that the coach floor be made removable, held by screws, so that interior details and glazing can be put in after it is painted.  There are no instructions supplied with the sets and it is best to first study the various parts to visualise and decide on the procedures to follow and in what order.  The various sections should not be cut free from the etch frets until they are required for building up.  Care is needed when cutting them free to avoid unnecessarily bending and stretching.  The edges of the sections should be tidied up with a fine file so that they can fit up properly and cleaned where they are going to be soldered. 

The best way to build a coach ‘kit’ is to start with assembling the basic coach body ‘box’. The coach sides should first be curved if appropriate.   The ends can be used as templates for this.  The method of actually bending the sides is up to the discretion of the modeller. It can be done by bending around a suitable piece of pipe or such likes.  Care is needed to avoid stretching or wrinkling the thin etchings as it is difficult to straighten them again. The edges of the coach sides will normally overlap the ends at the corners.  To ensure that the corners can be put together square and also to make sure they are strong and rigid enough to withstand normal handling,  it is a good idea to put stiffeners inside the corners.  The stiffeners can be made from left over strip from the etch frets, bent into right angles.   They are soldered inside the coach ends, flush with the edges.  The coach sides can then be lined up against the stiffeners and first just soldered to these.  After any adjustments to get a proper fit,  the rest of the join can be soldered up.  The soldering is done from inside the coach to prevent ‘runs’ from spoiling the outside.  The coach body should be checked to be square before going further.

The coach body will typically be lacking in rigidity because of the soft flexible etchings and it will be necessary to add some reinforcing.   It is a good idea to solder in stiffener strips along the top edges of the sides.  These could be pieces of brass rod, or can provide a use for salvaged otherwise unwanted brass rail.  However, the coach sides may still be found flexible and it may be necessary to provide extra transverse stiffeners between the sides. A compartment coach will have interior partitions and these will help to reinforce a coach body.   Obviously it is necessary to avoid buckling when soldering on long stiffeners.

Making the roof for a coach is another story.   Normally no material is supplied by Worsley Works for making the coach roof.   It is very difficult to properly form a piece of sheet brass to the correct shape, particularly the more sharply curved edges without a special (i.e. expensive) bending jig. One could adapt a plastic roof from another coach, by (say) splitting it along the centre and widening it out or otherwise adapting to suit the etched coach body  It is possible to buy commercial wood lengths milled to various profiles and one these may be suitable or could be adapted to suit the particular coach.   Another way would be to make one’s own roof, either from solid plastic or built up from plastic sheet and strips or from balsa.  The roof when attached to the coach helps to make the assembly more rigid.

Leave a comment

Filed under Modelling

Something a Bit Bigger…


I am grateful to Neil Ramsay for these photos of his wonderful 15mm scale model of CDR  six-wheel saloon no 1. The bodywork is cut from plywood, built up in layers to produce the panelling, the  use of real wood in this scale gives the  effect of the grain, and imparts more ‘atmosphere’ to the model. The axle-guards were gravity cast (from Neil’s masters) in white metal by John Campbell, who also provided the lamp-tops.

The interior is fully detailed, always a good idea for saloon stock, and especially in the larger scales. The internal mirrors are cut from old CDs with real French-polished woodwork and carpeting from dolls’ house wallpaper. The dining chair is a dolls house model in 1/24th scale, with a new seat from Das modelling clay. They are not really proper scale models of the originals, but give the right ‘feel’ when looking through the windows.

The chassis is built with  simplified Cleminson units,  a mixture of home made components  and sprung bearing assemblies from Ron Grant. The centre wheel assembly is shifted sideways by the linkage to the outer wheels. The problem in a model like this is trying to achieve maximum lateral movement of the centre wheels, as this determines the minimum radius (just about 5’) it will go round.  Springing greatly improves the running: in fact Neil’s  six-wheelers run better than bogie coaches and suffer less from buffer lock as the ends don’t stick out so much on curves. Wheels are Slaters gauge 1 split-spoke 37mm diameter. Neil recommends  Slaters 31mm diameter spoked wheels for the 2’ CDR and LLSR wheels. These wheels are coarse scale G1 and work really well in the garden.

1 Comment

Filed under Modelling

Locomotive Portrait: Cork, Bandon & South Coast Railway B4 Locomotive

Graham Bridle


I have liked the look of this loco ever since I took a greater interest in Irish railways. I know of no kits but Alan kindly sent me some 4mm and 7mm drawings. At the time I was modelled in 4mm.  I built a chassis for a B4 in 4mm but before I got any further I was at a small local show that was run by Gauge 0 Guild members. Although many scales were there, I was taken with gauge 0, which suited my eyes and ten thumbs better.  So I changed scales. I made a loco from an etched kit and bought a brass pannier, yes I know not Irish but GWR is next best! I also decided to go with the flow and stick to 32mm gauge using C&L products.  I decided to scratch build a B4. I made many mistakes as I went along for I am not good at working out all the pitfalls first. The chassis I built first and I will at some time make another.  I tried full spring suspension but found making sure all was level difficult. I had made the frames from too thick nickel silver and found the gearbox too wide. I fixed the axle bushes and after some filing it fitted. But I forgot to reassemble on the jig so the running was poor. I think I stripped and reassembled four  times, but it does run. The other main problem was with the bogie. Getting the right tension was difficult and I wonder if I should have used a swivel on a pivot set back.

The footplate and body were easier. The tank sides and cab were cut and soldered together to make sure they were symmetrical. There are flanges on the bottoms with captive screws so that the cab and tanks plus the boiler can be dismantled from the footplate separately although I now think this is not necessary. I invested in a riveter and roller.  Rolling the boiler was not too difficult, the riveting monotonous and not easy to maintain a line if a reversal in the riveter had to be done.  I do not have a lathe so I spoke to Laurie Griffin (Miniatures ). I sent the drawings to him and he did a good match with the boiler fittings. The chimney is not quite right but as all are screwed on I could change it if I find a better match. The boiler door also came from him and the darts.  Other proprietary fittings such as the buffers, jack, and couplings were picked up at trade shows. The sand boxes I made and are also screwed on. The coupling rods I think were universal ones from Slaters laminated at the right length.

My painting expertise is not brilliant but it will pass my inspection and as it is intended for my attic this is okay. The detail is not totally accurate because I noticed things after I had soldered up (e.g. the buffer mountings should be round and the bunker is not quite right) but overall I am pleased.  This has taken me several years to complete and I have enjoyed doing it. My better half said it was wonderful (honest!) but then it keeps me out of her way for many an hour. I bought a MGWR J26 kit on e-bay which will be my next engine. I do like the lines of the Neilson and Dubs engines supplied to the CB&SCR but I have no drawings. Anybody out there have any?

1 Comment

Filed under Modelling

Scratch Building a CIE Cement Bubble

Des Sullivan


Prior to its gradual demise, the freight section of  Irish Rail produced some very distinctive and unique rolling stock that just begs to be scratch built.   We have also been blessed that MIR has provided several quality kits in the past few years to recreate them.   The cement bubble has been one of these. However, when I decided to build an eleven to twelve  unit rake of them over twelve months ago, the euro-exchange rate at the time proved to be something of a disincentive.  I also wanted to capture some of the finer detailing that the existing kit as seen from the photo on Steve Johnson’s site didn’t seem to cover.  Since having built them, the euro has strengthened significantly and the kit has been superbly revised (what with a very solid new resin casting of the bubble and gangway and ladder brass etchings).  Oh well, c’est la vie.  I was fortunate in having the opportunity to photograph several of them at the old container sidings in Limerick station which revealed the finer detailing and colouring that would add to building a suitable model.

The basis for most 20’ four wheel CIE freight stock is the Dapol C043 cement wagon.  The distinctive springs, spring hangers and brake levers are all well captured on this model.  Also, because it is a plastic kit, there is much more “depth” to the brake mechanism than one would get with a single piece RTR moulding.  The dimensions are a little out, given that the model is a OO/HO hybrid, but this is really of minor importance compared to the abundance of chassis detailing.  Finally, there are several parts in the C043 kit that with minor alteration can be used to provide the extra detailing needed for the rest of the model.

  
Parts Needed
To build one you will need the following:
  • CO43 kit
  • Two Kinder Eggs – not the hinged type (yes, there are more than one) but the one with the two shells.
  • Guitar string (a light gauge “A” string).
  • A paper lollypop stick (c. 3.6mm diameter).
  • Transfer set (details later).
  • 0.35mm styrene sheeting 30mm x 80mm.
  • Scrap of net curtain material or K & S etched mesh 3/64 diamond.
  • Flexible 0.6mm wire.
  • Milliput.
  • Ratio signal ladder pack (#451).
  • Paint (beige, black, grey, white).

Chassis Construction
First, completely pare back and remove the raised rim on the wagon floor plate (part 6) using a sharp knife or blade.

Scribe and then remove the central part between the two holes.  I drill out several 6mm holes to make this easier.

Chamfer the straight sides of the hole at 45° to make for maximum surface and gluing contact between the bubble/egg and the base.

Construct the chassis as detailed in the Dapol instructions, make sure any flash or mould lines are pared and sanded back.  The main focus of these is at the buffer sides.

Remove the moulded chain from the end hooks prior to fitting as it will impede the coupling bars otherwise.

Widen out the wheels on the axles ever so slightly (0.2-0.3mm). Drill two holes on either side of the frames for the levers.

Base Detailing
The hole left after removing the central section of the plate is too long and will leave a gap at either side when the egg is put in place.  You will need to construct a new wagon floor sheet from styrene sheet that the bubble can sit into, see the adjacent diagram for the appropriate dimensions. 

Remember, fit-check-pare and repeat until a precise fit is got prior to gluing.  Then glue down the sheet onto the original chassis top.  It will take a bit of time, but once done properly, constructing another ten or fourteen can be done with assembly-line ease.   I made a stencil from styrene and used it to draw out and cut the other eleven chassis sheet covers once I was happy with the final dimensions.

Identify the plate (part 44).  This has raised diagonal detailing that matches the prototype closely.   Cut to size by removing paler material as shown in the attached diagram and remove the nodge on the top.  Fit at one end of the  wagon floor sheet, opposite of where the ladders will be.

Construct the cement pipes from chopped up parts 55 and 56.  Mark and drill 0.8mm holes in the floor sheet at the other end (opposite to where plate is on)  and fit.  Bend and then glue some 0.6mm wire to the back. Cut a 5mm length of lollypop stick at a 45° angle using a sharp knife, and mount near the pipes as shown.

Making the Bubble
One of the delights of scratch building this model is that the bog standard Kinder Egg is an almost exact scale replica of the bubble in terms of the hemispherical ends.    It does require lengthening and this is done as follows.Take a male section of one egg and carefully cut off the outer 4mm of the rim.  This is easy enough to do as the egg wall has a thin channel or groove here to act as a cutting guide.

Take the other egg and roughen the ends with sandpaper and then shape a small piece of Milliput so as to round the ends.  I recommend dampening the Milliput , applying to the egg end and then shaping it in the palm of your hand.  Leave to dry overnight. 

Fit the second egg ends together as shown and use the cut off piece from the donor egg (!!) to fill out the gap.  If the rim piece is cut carefully, it should be a perfect fit.  Glue the three pieces together.  Note that the plastic used does not take glue very well (even Superglue) so handle carefully.  It may be worth trying a more full-bodied epoxy glue though I haven’t done this to date. Glue the egg to the chassis base.  Glue some lead window strip underneath to add weight and ballast.

Other Detailing

Fit the manhole cover (part 51) as the Bubble cap.

Bend and glue the guitar wire as vacuum pipe.

The gangway can be made from net-curtain mesh (or K&S etched mesh) with a thin rim of styrene sheet .  Use double thickness styrene triangles as gangway supports and glue to the side of the bubble.

The ladder included in the kit is perfect, but there is only one in each kit!  I suggest Ratio signal ladder as an alternative.  It is also a little finer in scale. 

Fit the manhole cover (part 51) as the Bubble cap.


Bend and glue the guitar wire as vacuum pipe.


The gangway can be made from net-curtain mesh (or K&S etched mesh) with a thin rim of styrene sheet .  Use double thickness styrene triangles as gangway supports and glue to the side of the bubble.

The ladder included in the kit is perfect, but there is only one in each kit!  I suggest Ratio signal ladder as an alternative.  It is also a little finer in scale.

Given that a rake of fifteen  will probably remain permanently connected, for added realism I suggest using the coupling provided for the end wagons, and very light gauge wire loop glued to the hooks to connect each of the interim wagons.

Note: I will be producing a brass etch of the gangway and supports as an all-in-one bendable unit as an alternative to the above.  It will also include the ladders.  This should be available in January 2009.*

Painting and Transfers
Painting offers a few challenges as the model has had several liveries, including orange and beige.  However for the last decade and more, most of them are an interesting mottled shade of greyish white with algae green streaks.  The chassis originally was black but is now usually a non-descript grey-brown. If you are going to be building or repainting any volume of models,  I strongly recommend purchasing a good quality air brush, such as an Iwata HP-CS and a mini-compressor.  These can be got for quite good value off eBay.  The simple reason is you can paint a brace of kits in a matter of minutes using diluted acrylic paint with a smooth, uniform coat that covers even the most inaccessible parts, dries quickly and allows repainting almost immediately.

Paint the model in the following order:

  • Paint the entire kit in white primer.
  • Spray-paint the chassis and wheels in a lightish grey brown.
  • Spray the bubble beige (mask as necessary).
  • Fit the “Broken Circle” and cement decals. I made up my own stencil type transfers of the CIE circle, “Cement,” model numbers and wheel inspection dates. Contact me if you are interested in sets of these.*
  • From overhead, use a criss-cross alternating mixture of white and primer grey to get a non-uniform finish approximating to ten years of cement coating. Another option is to spray a thin mist of water and then sprinkle minute amounts of fresh dry Polyfilla powder through a very fine sieve to get the layered cement look.
  • Bend and attach the side levers using 0.6mm wire into the pre-drilled holes, paint white and then yellow.
  • Paint the cement pipes a darker shade of grey/brown.
  • Paint the ends of the brake lever white then red.
  • Paint the sole-bars at appropriate points as indicated in the picture and fit the chassis numbering and inspection stencils.

To Conclude…
Oh the hours of blood, sweat and tears that can be summarised in little over three pages!   However, taking the approach as laid out above and tackling them in an assembly line fashion, you can build a fifteen-unit rake for little over €100 in a matter of days.  The main points to re-iterate are: get plenty of pictures to be in that comfort zone about the detail locations and take your time to get the chassis cut out and chassis sheet dimensions and angles correct.  You’ll be well rewarded.  In a future issue, I’ll tackle how to build the 20’ beet wagon using Corrugated sheeting.  Nice!

[Ed: I once weathered a OO lime wagon with toothpaste, which looked like a thick coat of chalky minerals, but I would advises a test-patch, as some paint finishes may not tolerate tooth-paste.]


* dezsullivan@eircom.net

Leave a comment

Filed under Modelling

UTA MED Three-Car Diesel Train

Jeremy Fletcher


It is not intended as a direct insult to the steam junkies, but my own personal preference is for old railcars etc. which have been neglected or ignored in the past by the mainstream as a lower form of life compared to  steam locos, which they are not! Only now are they receiving more attention and appreciation, but still individual prototypes only attract modellers’ attention after all have been scrapped and proper measurements are hard to get! I previously made a model of the long gone GNR railcar ‘A’ on which I wrote up an article for New Irish Lines, May 2005. I have since made a model of the UTA MED diesel train. I made my model of a three-car MED set using brass etchings which I got made by Allen Doherty (Worsley Works). The etching sets are a basis for scratch building rather than what are normally sold as a kit: they just include body sides, ends and floors. Other parts such as roof and bogies, have to be obtained elsewhere or made by the modeller. I made the coaches by building them up directly from the etchings rather than doing “overlays” on existing available coach bodies.   Suitable ‘donor’ coaches would be extremely difficult to get where I live!.   Building directly from etchings is certainly a much more laborious way of doing it as I found out! There is much more soldering and it  requires care to avoid excessive warping and distortion.

Worsley Works three-car MED set

Worsley Works three-car MED set

Worsley Works three-car MED set

Worsley Works three-car MED set

Worsley Works three-car MED set

Worsley Works three-car MED set

The Worsley Works MED coach sides came in individual between-doors sections, aligned in their correct relative positions only by the fret sheets and separated by the spaces for the sliding doors.  It was therefore necessary to attach these together by soldering in the separate sliding door etches to produce complete one-piece body sides before they are separated from the frets to maintain the alignments.  It is also easiest to curve the body sides to the correct profile using the coach ends as templates before removing them from the frets.  This is made easier by first bending the sides and the sliding doors separately before soldering the doors in place.  I added narrow brass strips between the sides and the door edges to give more “depth” to the openings.   The coach sides were very flexible and prone to buckling, so I made interior partitions from shim brass and added brass cant rail strips along inside the top edges to add rigidity. I made the coach roofs from thin styrene sheet (Evergreen) which I bent to match the profile of the coach end etches.  Working with styrene sheet has its own fun aspects as it tends to warp when joined with liquid cement! I made the cab ends by filing from styrene.   Much filing and fiddling were required! I used the etched brass floor sheets provided.  As they are very thin and flexible I reinforced them by soldering on pieces of discarded brass code 100 rail. 

I powered the MED set by means of small flat can motors with flywheels, one under each power car, hidden by the under floor/engine details, driving by flexible shafts to small homemade final drive gearboxes which ride on the inner axles of the bogies.  This gives four driven axles out of a total of twelve, with the problems of traction tyres!. I used Comet LMS bogies which I modified to give insulated sides, with insulated half stub axles (Athearn style) to give current pick up on axles.   All axles pick up.  I used Northwest Short Line nickel silver wheels, which stay clean and give good pick up, and the MED set runs smoothly.   I used Markits coach buffers and Ratio corridor connections. I made basic interior seats from styrene as the coach interiors are very visible through the many windows. The MED train runs fairly well on ordinary DC, but  I do not know how well it would run on DCC.

2 Comments

Filed under Modelling

Getting Started On Soldering: The TDR Three-Plank Wagon Kit

Paul Titmuss


It is evident from discussion that there are a number of modellers who want to progress to brass and nickel silver kits, but are loathe to make the jump because there seems to be nothing for the ‘beginner’ to try their soldering skills with first. I was at this stage once and still find soldering outside my ‘comfort zone’, but am becoming more skilled and increasingly confident, though I don’t profess to be an expert. The Tralee & Dingle three-plank wagon, available from Worsley Works is, I believe, a good starting point. It is low cost (£4.50 + £1.50 P&P), can be used for either 009 or 00n3, and if you bottle out can be stuck together with glue (I have built a wagon using epoxy resin). It is designed to fit the Parkside Dundas Tralee & Dingle van chassis. I am attempting to build Annascaul Station on the Tralee & Dingle Light Railway and whilst there is a lot of stock available from model manufacturers several key items are not catered for, the three-plank wagon being one of them. With the help of published and unpublished photographs (generously loaned by David Rowlands) I drew diagrams for the wagon and sent them to Allen Doherty at Worsley Works, who used them to  create the necessary brass etches for the kit. The best published photograph of a three plank wagon (and one I relied upon heavily in the diagrams) can be found in The Tralee & Dingle Railway by David Rowlands, published by Bradford Barton, p75. By the time of closure each of the remaining wagons had been reconstructed so there were differences between them.

Photo #1: This shows the etch, constructed wagon body and the completed wagon on Parkside Dundas T&D van chassis.

Photo #1: This shows the etch, constructed wagon body and the completed wagon on Parkside Dundas T&D van chassis.

Photo #2: The set up used for soldering. An Antex 25W soldering iron and stand, flux and 145° solder. I do not usually go to the extreme of soldering outside, but on a nice day its quite pleasant, but dont drop any parts!

Photo #2: The set up used for soldering. An Antex 25W soldering iron and stand, flux and 145° solder. I do not usually go to the extreme of soldering outside, but on a nice day it's quite pleasant, but don't drop any parts!

Photo#3: The first job is to tap in the bolt heads. I do this with a pin whilst the brass etch is resting on a piece of hardboard. A light tap is enough. When this is done flux and solder (tin) the insides of both sides and ends. When completed cut the parts out of the fret and clean up the rough edges with a file.

Photo#3: The first job is to tap in the bolt heads. I do this with a pin whilst the brass etch is resting on a piece of hardboard. A light tap is enough. When this is done flux and solder (tin) the insides of both sides and ends. When completed cut the parts out of the fret and clean up the rough edges with a file.

Photo #4: Line up the pieces, ensuring that the outside overlaps the inside section equally at both ends. I have recently acquired some little clips to help. The work is then held in a vice.

Photo #4: Line up the pieces, ensuring that the outside overlaps the inside section equally at both ends. I have recently acquired some little clips to help. The work is then held in a vice.

Photo #5: Flux is applied to the top edge and then solder run along the joint.

Photo #5: Flux is applied to the top edge and then solder run along the joint.

Photo #6: When happy with the join put the side or end on the work surface, inner side up and then apply heat from the soldering iron to help the tinned sides make a better bond. There should be a little solder on the tip of the iron to help with the transfer of heat.

Photo #6: When happy with the join put the side or end on the work surface, inner side up and then apply heat from the soldering iron to help the tinned sides make a better bond. There should be a little solder on the tip of the iron to help with the transfer of heat.

Photo #7: To join a side end place upside down on the work surface. The end piece goes inside the wagon side. Make sure the joint is fluxed. I hold the work in place with Blu-tack®. I also used some fine graph paper to help get the pieces square. The join between the two parts can then be soldered.

Photo #7: To join a side end place upside down on the work surface. The end piece goes inside the wagon side. Make sure the joint is fluxed. I hold the work in place with Blu-tack®. I also used some fine graph paper to help get the pieces square. The join between the two parts can then be soldered.

Photo #8: When both pairs of sides and ends have been joined I then solder up the remaining corners an the basic body shell is complete. You may wish to trial fit the chassis floor at this stage (see photo #11).

Photo #8: When both pairs of sides and ends have been joined I then solder up the remaining corners an the basic body shell is complete. You may wish to trial fit the chassis floor at this stage (see photo #11).

Photo #9: The strapping can then be applied. These pieces can be easily fixed using epoxy resin. If you attempt to solder the straps make sure they are tinned on the fret first, and would be an idea to apply the straps to the work before the sides are built up. The tall end straps are raised from the body and I glued these to strips of plastic card, and then these in turn were glued to the wagon ends.

Photo #9: The strapping can then be applied. These pieces can be easily fixed using epoxy resin. If you attempt to solder the straps make sure they are tinned on the fret first, and would be an idea to apply the straps to the work before the sides are built up. The tall end straps are raised from the body and I glued these to strips of plastic card, and then these in turn were glued to the wagon ends.

Photo #10: The corner plates need to careful bending in a vice. I held them between two rulers and pressed the edge over with a small piece of 1 x 1 timber. On the actual wagon the short edge went along the side so there is no need to panic if the two edges are not the same length. To complete the door straps lengthen the hinge gap by cutting into the etch. Place a fine piece of wire (not supplied) on the edge of the board (with Sellotape®) and press to shape. If the wire has been tinned and the job fluxed this is an easy soldering job. Cut off spare wire and etch before fixing in place. The door straps should just overlap the edges for the door sides.

Photo #10: The corner plates need careful bending in a vice. I held them between two rulers and pressed the edge over with a small piece of 1" x 1" timber. On the actual wagon the short edge went along the side so there is no need to panic if the two edges are not the same length. To complete the door straps lengthen the hinge gap by cutting into the etch. Place a fine piece of wire (not supplied) on the edge of the board (with Sellotape®) and press to shape. If the wire has been tinned and the job fluxed this is an easy soldering job. Cut off spare wire and etch before fixing in place. The door straps should just overlap the edges for the door sides.

Photo #11: The Parkside Dundas chassis can be made up. The floor needs to be carefully sanded to size, a tad off each end (including the sole bars) and a little more off the sides (circa 0.25mm each side) so that the body fits the floor (it might be an idea to fit this before the strapping is applied as a dry run). Dont get too carried away as it is easy to remove too much floor. Next the body is glued to the floor. Vacuum pipes need to be sourced (or those that come with the chassis can be used) plus couplings of choice added to complete construction. It is best to give the brass a coat of etched brass primer before painting and weathering to taste. Hopefully, you have now completed a first successful taste of soldered kit construction. Do remember that if you bottle out with the soldering then the kit can be glued together, so it wont be wasted.

Photo #11: The Parkside Dundas chassis can be made up. The floor needs to be carefully sanded to size, a tad off each end (including the sole bars) and a little more off the sides (circa 0.25mm each side) so that the body fits the floor (it might be an idea to fit this before the strapping is applied as a 'dry run'). Don't get too carried away as it is easy to remove too much floor. Next the body is glued to the floor. Vacuum pipes need to be sourced (or those that come with the chassis can be used) plus couplings of choice added to complete construction. It is best to give the brass a coat of etched brass primer before painting and weathering to taste. Hopefully, you have now completed a first successful taste of soldered kit construction. Do remember that if you bottle out with the soldering then the kit can be glued together, so it won't be wasted.

Acknowledgements:
Thanks to David Rowlands for the loan of photographs, Allen Doherty for the preparation of etches and Simon Starr for exchange of ideas.

Addendum:
If anyone has already purchased one (or more) of the three-plank wagon kits there was an error with the original production etch. The right hand door straps are now available on receipt of an SAE from Worsley Works. My third wagon was completed with these.

2 Comments

Filed under Modelling

Building BCDR Diesel No. 2

Denis Bates


No. 2 at Ballynahinch (Denis Bates Collection)

When travelling from Dundrum to Belfast in the 1940s, a journey I often did, one of the sights on the journey was of the Ballynahinch branch train. Although sometimes the branch engine was 2-4-0 No.6, more often it was No.2, the Harland and Wolff diesel electric loco of 1933. Looking like a Co, it was in fact a 1B: the front axle was un-powered, and the other two axles motored. Harland and Wolff tried, with a little success, to break into the diesel market in the 1930’s, supplying engines to the LMS. A diesel shunter was supplied to the NCC, and a Bo-Bo, No.28, to the BCDR.  No.2 (originally numbered D1) was their first diesel electric locomotive, and was described in some detail in The Locomotive (June 15th 1933) and The Oil Engine (May 1933) from which the general arrangement drawing is taken.  The engine was rated at 270hp, and could haul 200 tons up a gradient of 1:100 at 16mph. On the BCDR it spent most of its life on the Ballynahinch branch. As it could not provide steam heating, a set of carriages was modified to provide electric heating. On the closure of BCDR’s main line in 1950, it was sent, together with brake carriage, to provide a short lived service between Newcastle and Castlewellan. It travelled south on Sunday 14th January 1950, illustrated in RM Arnold’s book at Crossgar. I recorded it at Dundrum – it must have travelled via Downpatrick station rather than the Loop Line, as it was cab first at Crossgar, and bonnet first at Dundrum.. Eventually it was returned to Harland and Wolff, and was used by them as a shunter in the shipyards.

No. 2 in what appears to be mint condition (Denis Bates Collection)
No. 2 at Dundrum (Denis Bates Collection)

No. 2 at Dundrum (Denis Bates Collection)

The Model: Chassis
When buying Athearn diesel parts for building my Turfburner model (New Irish Lines…), I measured a number of Athearn diesels. I found that the bogie wheelbases of loco PA-1 were the same as those for No.2. This led me to buy an extra bogie. In addition, a set of gears made by the Ernst Manufacturing Co, of Oregon (listed in Walther’s catalogue) enabled the gear reduction to be increased.
Chassis

Chassis

At the time of writing, this loco is not listed in the current Athearn listings, so may be out of production. As with the Turfburner, wheelsets were made up using the Athearn axle muffs, turning stub axles and wheel centres, in conjunction with P4 wheel rims supplied by Alan Gibson. A small Mashima motor and a turned flywheel were mounted on top of the bogie, driving the original Athearn worm wheel and hence the drive train. Leads from the motor were soldered to the chassis side frames, and off the mechanism went. For P4 standards, the centre axle cut outs were filed slightly high to allow the axle more vertical play. The rest of the chassis is composed of the dummy outside frames, buffer beams and footplate. The most distinctive features are the Isothermos axle boxes. These were turned on the lathe, and added to the spring units: I think I trawled through catalogues to find tender springs/axle boxes which seemed closest in appearance. Sprung buffers were again turned.


Body
Body


Body
Body

I originally thought to make the body myself, but eventually asked Joe Magill, who has made some beautiful models of Irish prototypes in both 4 and 7mm scales, to make it for me – so the striking appearance is his. The distinctive louvres were etched to order by Bill Bedford, to artwork that I drew (they now appear in his pricelist). The paintwork is again by Joe Magill.

So No.2 is ready to enter service, when I get some track laid. Baseboards have already been made, and at the moment the thoughts are of the Ardglass branch – either the very simple Ballynoe station, or Ardglass itself, with its turntable and extension to the quay. Ballynoe station still has its full complement of buildings; Ardglass in 2004 had the goods shed, and a very derelict but complete station building.


The Model: Body


9 Comments

Filed under Modelling